Lafayette Parish Master Gardeners
  • Home
  • About Us
  • Programs and Activities
    • School Garden Initiative
    • Vermilionville Medicinal Demonstration Garden
  • Festival des Fleurs 2023
  • Resources
    • Louisiana Certified Plant Habitat
    • LSU AgCenter
    • Speakers Bureau
  • Become a Master Gardener
  • Member benefits
  • Contact Us
  • Sign up for emails
  • Member login
  • Past Executive Board Officers

April 2016

4/1/2016

0 Comments

 
Picture
USING MEDICINAL PLANTS WITH MARY ANN ARMBRUSTER
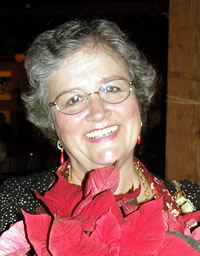
We learned that this will be the last column of Between The Rows that Mary Ann will be sharing with us for a while. The Master Gardener Newsletter team extends a hearty thank you for the wealth of knowledge and witty humor that she has shared over the years. This month we provide part two of her submission on medicinal plants as we savor the final      Between                             the Rows (at least for now). 


Picture
Picture
Picture
Picture
Picture
Picture
0 Comments

March 1st, 2016

3/1/2016

0 Comments


USING MEDICINAL PLANTS WITH MARY ANN ARMBRUSTER

This is a departure from my normal column, but I was having a terrible writer’s block – I just could not think of anything to write – so Theresa suggested that I do this instead. I hope you enjoy it. Many of us want to use medicinal plants, but how to use them? It’s fairly simple, so here goes. Before I start, I have to include this NOTICE: The information presented here is meant for educational and historical use only. It is not meant as a substitute for medical diagnosis or treatment.

Today we will talk about infusions. To use plants, we want to extract the compounds inside the plants into a liquid that we can take or use in some way. This extraction is called an infusion. There are many different types of infusions, but the simplest is a tea. A tea is an infusion made using boiling or near-boiling water. If you can make cup of Lipton, you can make an herbal tea.

It’s certainly possible to make tea a cup at a time, but it is easier to make enough for 2-3 days at a time and refrigerate the unused portion, well covered, until needed.

HOW TO MAKE TEAS: For 1 cup: 1-3 teaspoons dried plant material to each cup of water depending on your preference. For 1 pint: 1 ounce dried material to a pint of water or 2 ounces of plant material to a quart. If you wish to use fresh plant material, use twice as much as you would 
 use dried. Place the plant material into a heat-safe container, bring water to a boil and pour over the plant material. Cover and steep 3 to 5 minutes, strain and use.

HOW TO MAKE COLD INFUSIONS: This is used for compounds that are heat-labile (those that will be damaged or destroyed by heat.) Use the same quantities as for a tea, but instead of using boiling water, mix the plant material with unheated water and allow it to steep for 30 to 60 minutes, strain and use. As with teas, it is easier to make enough for 2-3 days at a time and refrigerate the unused portion until needed.

HOW TO MAKE DECOCTIONS: Decoctions are used for hard plant material, like roots, bark or hard seeds. For a decoction, mix the plant material with water in a pot. Bring to the boil, reduce the heat, cover and simmer gently for 20 to 60 minutes, strain and use. Refrigerating any unused decoction will keep it good for a few days.

HOW TO MAKE SYRUPS: Syrups are long-lasting and good-tasting infusions. To make a syrup, start with 2 ounces of dried plant material to a quart of water in a pot. On low heat, simmer gently until the volume is reduced to about 1 pint. Strain out the plant material, then add 1 cup of honey, maple syrup or vegetable glycerin, and mix well. Optional: You can add 1 ounce of brandy to each pint of syrup. This will increase the
shelf-life by acting as an anti-microbial. Syrups will keep for months at room temperature or longer if refrigerated.

HOW TO MAKE TINCTURES: Tinctures are the most potent infusions and are super simple to make - no heat required. The liquid used can be 80 or greater proof alcohol (usually brandy or vodka, but pure grain alcohol works very well), raw apple cider vinegar or vegetable glycerin.  Alcohol is the most efficient solvent, being able to extract both acidic and basic compounds. Vinegar or glycerin are less efficient, but there are situations in which it is best to avoid alcohol - when the tincture is to be used to treat children comes to mind. Chop the plant material finely; this is one preparation for which it is best to use fresh material rather than dried. Pack the finely chopped plant material in a clean, dry jar. Pour in the liquid to cover the plant material by 1 to 2 inches. Make sure that the plant material is continually kept under the liquid – use something nonreactive to hold it under the surface of the liquid, if necessary. Store in a cool, dark place and mix by inverting every day or two. Caution:  Alcohol, especially, can seep from even fully closed containers, and alcohol can damage furniture finishes. To make sure you avoid damage, place the tincture jar on a glass plate or another non-reactive container that will capture any leaks and prevent the liquid from coming in contact with your furniture. Better safe than sorry.  Continue to mix by turning the container over and over every day or two for 4 to 6 weeks. When the extraction is complete, strain out the plant material, squeezing to salvage as much liquid as possible. The used plant material can go on your compost pile. Tinctures are handy to use and only require about 30 drops per dose or two droppers full. If placed in a small bottle, they can easily be carried in a pocket or purse, so it’s best to store them in small dropper bottles. To use, the tincture can be diluted in pre-heated water to make a tea, but the most effective way to take  a tincture is to place the drops under the tongue. Taken this way the medicinal compounds are transferred directly into the bloodstream without having to go through the GI tract (mouth, stomach, intestine…).

HOW TO MAKE INFUSED OILS: Infused oils are also easy to make and can be used in the kitchen as well as the medicine cabinet. This is one place that dried plant material is MANDATORY. DO NOT USE FRESH HERBS, USE ONLY DRIED! Fresh material contains water; water makes it possible for Clostridium botulinum to grow, potentially leading to botulism. Using only dried materials and oil avoids introducing water into the oil. Without water, the bacterium cannot grow. Here is a link to an article from the University of Maine on
making infused oils: http://umaine.edu/publications/4385e/  Mix the herbs with the oil in a pot and heat gently for 25 to 45 minutes. Cool and strain. Bottle - dark bottles are preferable here. Stored in a cool, dark location the infused oil will last for months. Infused oils can be used in turn to make creams and lotions.

HOW TO MAKE LINIMENTS: A liniment is made using the same procedure as a tincture, except that it uses rubbing alcohol as the liquid instead of ethanol (brandy, vodka, etc.). This means that the finished product must be used externally only. A tincture could be used externally, but usually isn’t used this way because drinking alcohol is much more expensive then rubbing alcohol. It is more cost effective to make a separate batch for external use. So remember, TINCTURE INTERNAL, LINIMENT EXTERNAL. Next time look for information on lotions and creams and a very attractive recipe!
Until


0 Comments

February 2016

2/1/2016

0 Comments

 
We’re getting to the end of winter now. Soon spring will be here and we can start complaining about the hot weather again. February is the last ‘winter’ month. After this, ‘warm’ will be more common and more consistent. It’s not that we haven’t had warm during the winter months, but it was neither consistent nor common. I, for one, am looking forward to the warm.

Starting now until mid-February you can plant broccoli, Chinese cabbage, carrots and cauliflower, after mid-month, plant snap beans and sweet corn. All month long you can plant beets, Swiss chard, mustard greens, Irish potatoes, radishes and turnips out in the open garden, but eggplant, pepper and tomato seeds need protection. Plant these indoors, in the greenhouse or in the cold frame. (If you need a review of cold frames, refer to Between the Rows for February 2015 on the Master Gardener website.) It’s still too cold to plant these warm-weather-lovers outdoors. They need warmth, so if you want transplants when the weather gets warm, plant those seeds in a protected area now and baby them until it’s time to set them out.

Let’s review the reasons to grow your own transplants: 1. More variety: you can never get the variety of commercial transplants that you can find in seeds; 2. Control: you know what you put into the transplants, no pesticides, herbicides, synthetic fertilizers, if you don’t want them; and, 3. You have the transplants you want when you want them. No waiting for the growers to get them to the nursery.

Speaking about variety, you know that eating a colorful diet is healthier for you, right? Well, you can start eating that colorful diet by choosing more colorful varieties when choosing seeds. Take cauliflower, for example, white is good. It’s loaded with nutrients – just look what you get in a one cup serving!
Picture
That’s a pretty potent nutrition package, especially considering it also provides 10% of daily fiber and does it in only 25 calories with a low glycemic index. That means it doesn’t cause your blood sugar to shoot up.

When you eat purple cauliflower, however, you get all of the benefits of white cauliflower plus a number of extra goodies. One of those extras is anthocyanins. Anthocyanins are the reason it’s purple and not only does it make the flower bud pretty, they can help to lower your risk of Type 2 diabetes, prevent heart disease and eye problems, improve brain function, and help to control your weight. Anthocyanins are also antimicrobial and eliminate many types of environmental pollutants. It’s also a super antioxidant that can work for up to three days reducing free radicals, unlike most antioxidants that work once and are then broken down.

Another super health benefit found in purple cauliflower is glucoraphanins. These are the compounds in cruciferous vegetables, like broccoli, cauliflower, Brussels sprouts, cabbage and kale that provide their anti-cancer benefit. The glucoraphanin is broken down into a compound called sulforaphane that is absorbed in the intestine then modified in the liver to actually produce the anticancer compound, which causes the cancer cell to self-destruct without harming healthy cells. How’s that for super-duper high powered nutrition? One note, though, to gain maximum benefit you should eat your purple cauliflower raw.That’s just one example of better nutrition through choosing colors. So when you’re choosing your seed varieties, choose color whenever you can.

The Ag Center recommends the following varieties of bush beans: Blue Lake 274, Bronco, Contender, powdery mildew resistant (PM), Derby, an All American Selection (AAS), Festina, Lynx, Magnum, Provider, downy mildew resistant (DM, PM), Roma II, Royal Burgundy (think anthocyanins again), Strike and Valentino. For pole beans the recommendations are: Blue Lake, Kentucky blue (AAS), Kentucky Wonder 191, McCaslin, Rattlesnake (striped) and Yardlong Asparagus Bean (one of my absolute favorites; it’s never failed me). For the various types of sweet corn, the recommendations are: of the Sweet varieties, try Gold Queen, Merit, Seneca Horizon (bicolor, BC), or Silver Queen; of the Supersweet varieties, try Golden Queen and Honey ‘N Pearl (AAS, BC); of the Sugar Enhanced (SE) varieties, try Ambrosia, Avalon, Bodacious, Delectable, Honey Select (AAS), Incredible, Lancelot (BC), Miracle, Precious Gem (BC) or White Out.

Don’t forget to fertilize. For snap beans, add 2 to 3 pounds of 8-24-24 or 2 to 5 pounds of 8-8-8 per 100 feet of row before planting. For beets, carrots, radishes, turnips, rutabagas and kohlrabi, add 6 to 7 pounds of 8-8-8 or 4 to 5 pounds of 8-24-24 before planting, then side dress 3 to 4 weeks after planting. For cabbage, collards, broccoli, Brussels sprouts and cauliflower, add 5 to 6 pounds of 8-8-8 or 3 to 4 pounds of 8-24-24 before planting, then side dress 3 to 4 weeks after planting, then again in another 2 to 3 weeks.

That’s about it for February. Talk with you again next month. Until then, Happy Gardening!!

0 Comments

January 2016

1/1/2016

1 Comment

 
The Recommended Varieties For Eggplant Are Black Beauty, Calliope, Classic, Dusky, Epic Fairy Tale (Aas), Ichiban, Night Shade, And Santana. For Lettuces, The Ag Center Recommends The Following: In The Romaine Category: Cimmaron Red, Cuare (Dm), Flashy Trout Back, Green Towers, Paris Island Cos, Red Eye And Tall Guzmaine Elite. In The Leaf Lettuce Category They Recommend: New Red Fire Mi (Dm), Red Salad Bowl, Nevada (Dm) Sierra Red Sails, Salad Bowl, Tango, And Grand Rapids. Finally, They Recommend Buttercrunch, Esmeralda (Dm), Great Lakes And Ithica In The Heading Lettuce Category. Do Remember That The Heading Lettuces Are The Most Difficult For Us To Grow Here. Our Short Cold Season Makes It Difficult For The Heads To Form Properly. Leaf Lettuces, On The Other Hand, Are Super Easy To Grow And We Can Start Harvesting Within A Few Weeks. There’S Absolutely Nothing Like A Salad Of Baby Lettuces From Your Own Garden.I have broccoli, cauliflower and cabbage transplants out and I planted peas mid-December, Oregon Sugar Pod II and Mammoth Melting Sugar. I couldn’t wait to see those tiny green shoots pop up with the rain that we had. Now I’m hoping that I get a yield from them since I planted them at the wrong time. I’ll let you know how it works out.

Starting mid-January you can plant beets, Chinese cabbage, carrots, cauliflower, Swiss chard, Irish potatoes and radishes, all from seed out in the garden. You can also plant eggplant from seed, peppers from seed indoors to generate seedlings to set out later in the year. You can plant broccoli, cabbage, Kohlrabi, lettuces, mustard greens, onions or leeks from sets, English peas, shallots, spinach and turnips all month long. Also during January you can plant tomatoes from seed indoors.Starting mid-January you can plant beets, Chinese cabbage, carrots, cauliflower, Swiss chard, Irish potatoes and radishes, all from seed out in the garden. You can also plant eggplant from seed, peppers from seed indoors to generate seedlings to set out later in the year. You can plant broccoli, cabbage, Kohlrabi, lettuces, mustard greens, onions or leeks from sets, English peas, shallots, spinach and turnips all month long. Also during January you can plant tomatoes from seed indoors.

The recommended varieties for eggplant are Black Beauty, Calliope, Classic, Dusky, Epic Fairy Tale (AAS), Ichiban, Night Shade, and Santana. For lettuces, the Ag Center recommends the following: in the Romaine category: Cimmaron Red, Cuare (DM), Flashy Trout Back, Green Towers, Paris Island Cos, Red Eye and Tall Guzmaine Elite. In the leaf lettuce category they recommend: New Red Fire MI (DM), Red Salad Bowl, Nevada (DM) Sierra Red Sails, Salad Bowl, Tango, and Grand Rapids. Finally, they recommend Buttercrunch, Esmeralda (DM), Great Lakes and Ithica in the heading lettuce category. Do remember that the heading lettuces are the most difficult for us to grow here. Our short cold season makes it difficult for the heads to form properly. Leaf lettuces, on the other hand, are super easy to grow and we can start harvesting within a few weeks. There’s absolutely nothing like a salad of baby lettuces from your own garden.

Beets, carrots, radishes, turnips and kohlrabi should be fertilized with 6-7 pounds of 8-8-8 or 4-5 pounds of 8-24-24. Do this by side-dressing 3 to 4 weeks after planting.

Since this is the Christmas season and I’m sort of busy I’m going to make this one shorter than usual. I wish you all a wonderful, peaceful Christmas and all the best in the coming year.

Until next time – Happy Gardening!
1 Comment

    Author


    MARY ANN ARMBRUSTER
    Master Gardeners

    Picture

    Archives

    April 2016
    March 2016
    February 2016
    January 2016

    Categories

    All

    RSS Feed

     Members only    © 2013-2023 Lafayette Parish Master Gardeners Association, Inc. All Rights Reserved